
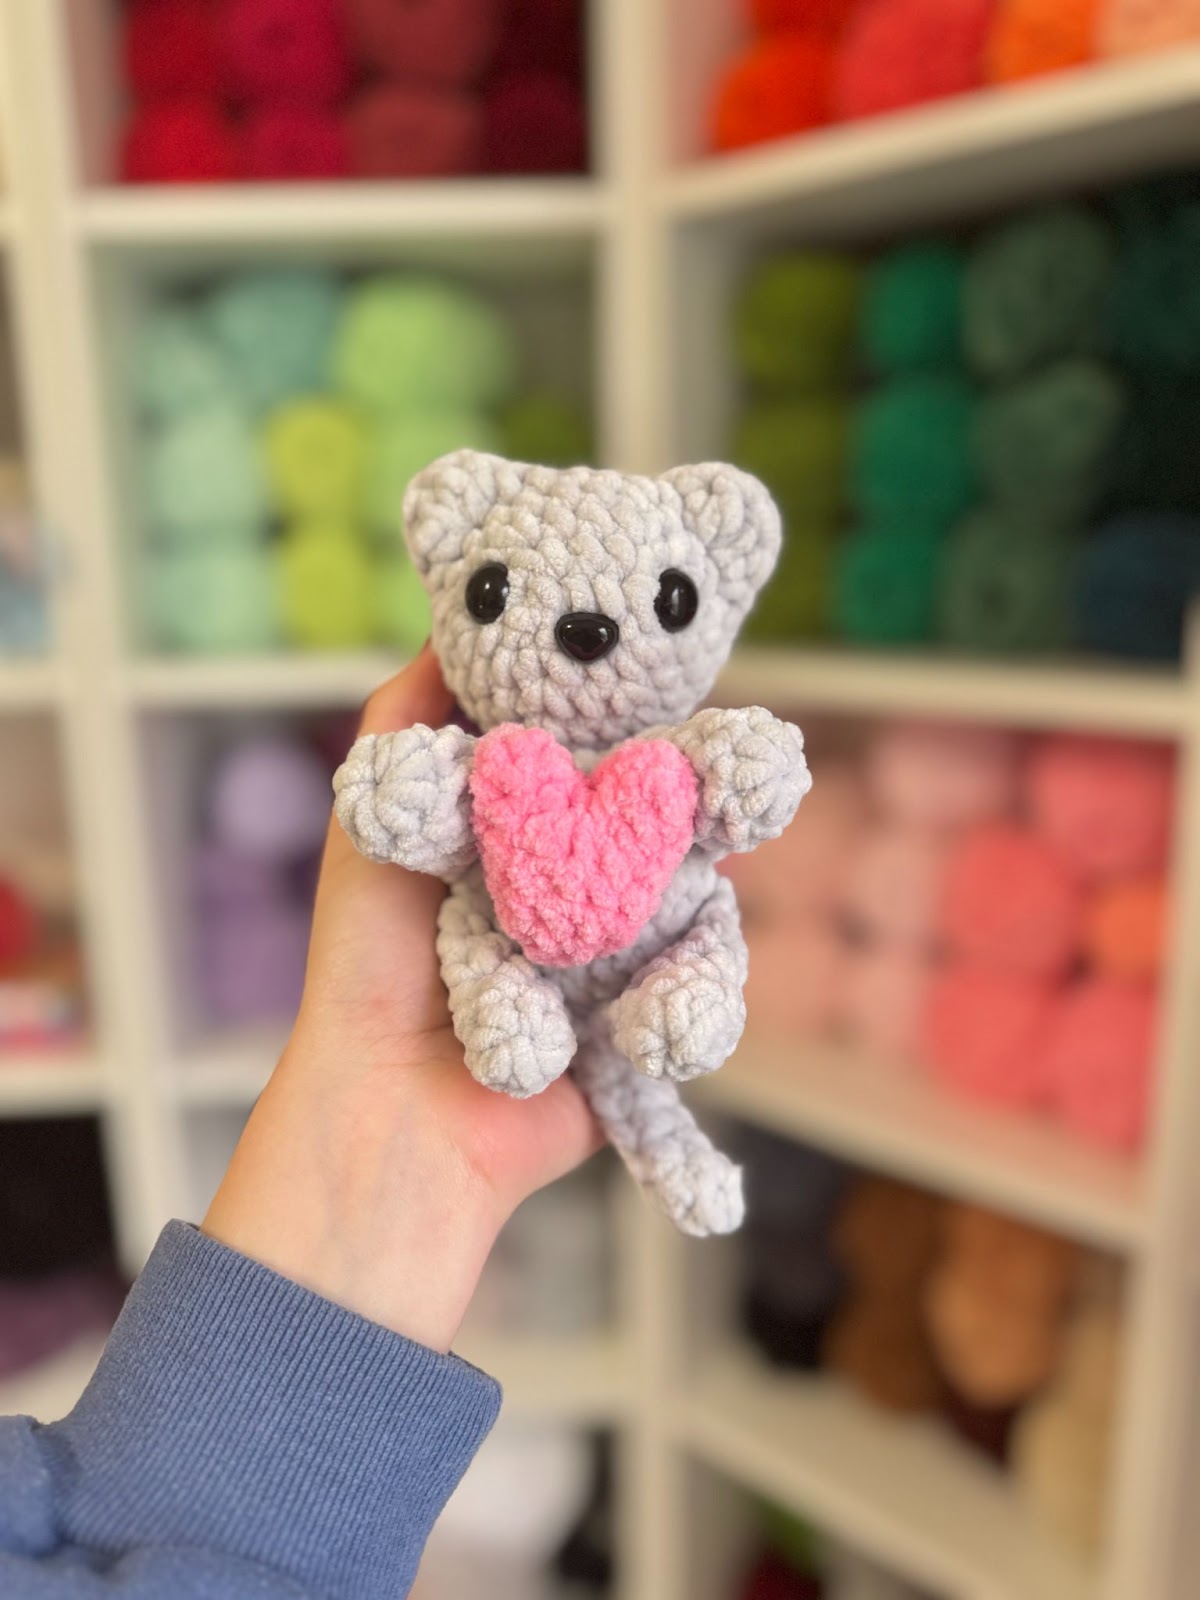
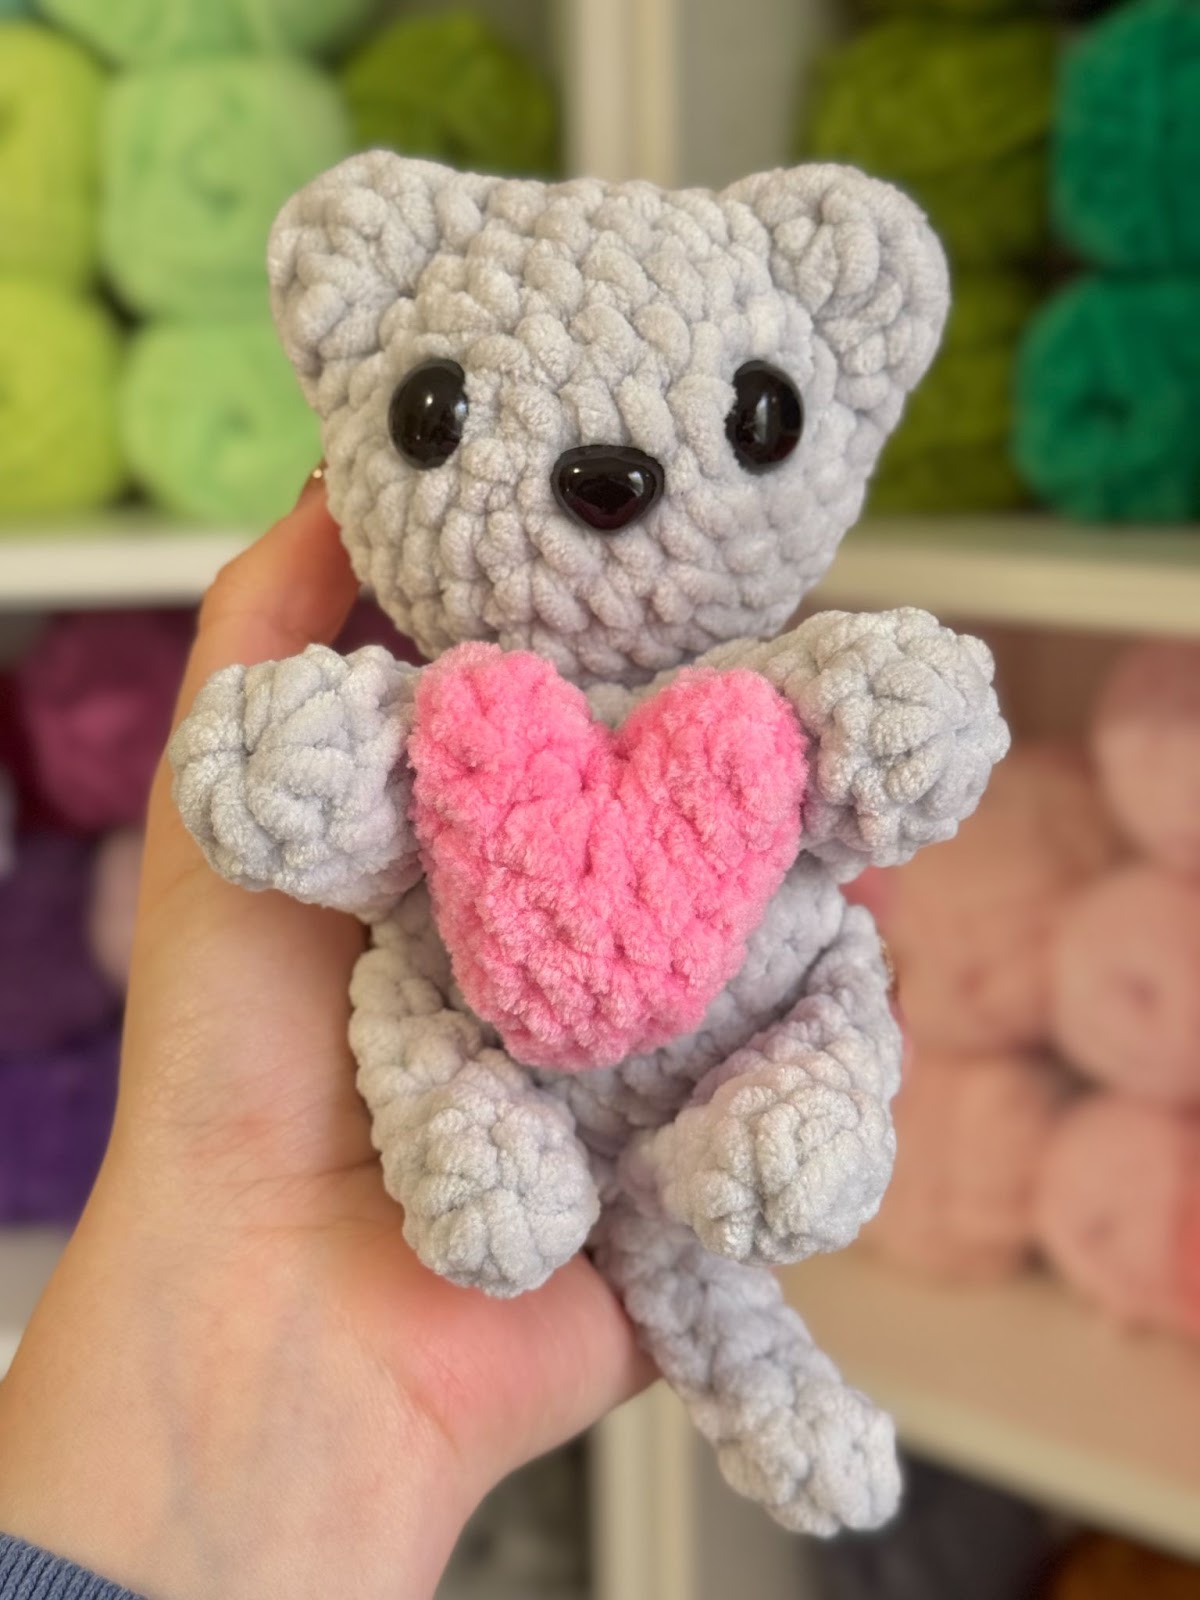
No-Sew Crochet Kitten
If you’re looking for a quick and easy Valentine’s Day crochet project, look no further! This no-sew crochet cat pattern will work up in just under 2 hours. And the best part… NO sewing! Whether you’re making this project for an upcoming market or your Valentine, I’m confident you’ll love it!
If you need any extra help with this pattern, check out my YouTube tutorial (linked below)! In this video, you’ll find a step-by-step guide to creating this adorable pattern. Let’s get into it!
YouTube Tutorial
Disclaimer
You may not sell or redistribute this pattern in any capacity. The pattern and photos in this document are the property of Hooks and Heelers. Finished projects from this pattern may be sold, but I ask that you credit Hooks and Heelers as the designer. Some links may be affiliate links, meaning I earn a commission by purchasing these products at no extra cost to you. Thank you for supporting me by using my links!
Materials
- Premier “Parfait Chunky” super bulky weight #6 yarn [100% polyester, 131 yards/ 120m per 100g skein]; Fog (Gray), Bubblegum (Pink),
- US size 7 (4.5 mm) crochet hook
- (2) 18 mm safety eyes
- Polyfill
- Scissors
- Stitch marker
- Tapestry needle
Pattern Notes
-This pattern is written in US terms and Imperial measurements.
-Pattern is worked in continuous rounds without joining unless otherwise stated.
-Use a stitch marker to mark the beginning of round. Move the marker up each round.
Change Color: to change color, insert hook into stitch and pull up a loop, complete stitch by pulling new color through both loops on hook.
Abbreviations
[ ] – Repeat
BLO – Back Loop Only
ch – chain
FLO – Front Loop Only
FO – Fasten Off
inc – 2 sc in same stitch
sc – single crochet
sl st – slip stitch
st(s) – stitch(es)
Special Stitches
Invisible Decrease (inv dec): [Insert your hook into the front loop of the next two stitches and pull up a loop, yarn over and pull through both loops on hook.
Pattern Instructions
Head
With Gray,
Round 1 – ch 6, sc in 2nd ch from hook and in next 3 ch(s), sc 3 in last ch, working on opposite side of ch, sc 3, inc (12)
Round 2 – [sc 1, inc] 6 times (18)
Round 3 – [sc 2, inc] 6 times (24)
Round 4 – sc around (24)
Ears will be worked in Round 5. Place a st marker into the BLO of the ear to help identify the BLO in Round 6.
Round 5 – work everything within (…) into the FLO (sc 1, [dc 2, ch 1, dc 2 in same st], sc 1), sc 4, (sc 1, [dc 2, ch 1, dc 2 in same st] sc 1), sc 14 (24)
Round 6 – work everything in (…) into the BLO of R4 (sc 3), sc 4, (sc 3), sc 14 (24)
Secure safety eyes between Rounds 2-3, (7) sts apart. Secure nose in Round 1, centered between the eyes.
Rounds 7-8 – sc around (24) (2 rounds)
Round 9 – [sc 2, inv dec] 6 times (18)
Begin stuffing firmly
Round 10 – [sc 1, inv dec] 6 times (12)
Round 11 – [inv dec] 6 times (6)
FO, leaving an 8 in (20 cm) tail. To close hole, using tapestry needle and tail, insert needle into FLO of each stitch of round 11. Pull tail to close, weave in tail.
Arms (make 2)
With Gray,
Round 1 – sc 8 in a magic ring (8)
Rounds 2-5- sc around (8) (4 rounds)
Do not stuff. Press final round together and sc across to close (4). FO, leaving a 3 in (8 cm) tail. Arms are ready to attach as you crochet the body.
Legs (make 2)
With Gray,
Round 1 – sc 6 in a magic ring (6)
Rounds 2-3 – sc around (6) (2 rounds)
Round 4 – [sc 1, inc] 3 times (9)
Round 5 – sc around (9)
Round 6 – [sc 2, inc] 3 times (12)
Stuff lightly and press final round together. Working through both sides, sc 1 [inv dec] 2 times, sc 1 (4). FO, leaving a 3 in (8 cm) tail. Legs are ready to attach as you crochet the body.
Tail
With Gray,
Round 1 – sc 6 in a magic ring (6)
Rounds 2-7 sc around (6) (6 rounds)
Do not stuff. Press final round together and sc across to close (3). FO, leaving a 3 in (8 cm) tail. Tail is ready to attach as you crochet the body.
Body
With Gray,
Round 1 – sc 6 in a magic ring (6)
Round 2 – [inc] 6 times (12)
Round 3 – [sc 1, inc] 6 times (18)
Round 4 – [sc 2, inc] 6 times (24)
Arms and legs will be crocheted on in Round 5
Round 5 – (leg: sc 4), sc 3, (arm: sc 4), sc 2, (arm: sc 4), sc 3, (leg: sc 4) (24)
Head will be attached in Round 6.
To attach the head, sc through both body and Round 4 of head. Ensure that you are working through the bottom of the head and that head is centered.
Round 6 – sc 10, (head: sc 4), sc 10 (24)
Sc 2 past the end of round. This will be the new beginning of round. Tail will be attached in Round 7
Round 7 – sc 21, (tail: sc 3) (24)
Round 8 – sc around (24)
Round 9 – [sc 2, inv dec] 6 times (18)
Begin stuffing firmly
Round 10 – [sc 1, inv dec] 6 times (12)
Round 11 – [inv dec] 6 times (6)
FO, leaving an 12in (30 cm) tail. To close hole, using tapestry needle and tail, insert needle into FLO of each stitch of round 11. Pull tail to close. Use remaining tail to secure the back of the head to the body. Weave in ends.
Heart
Top Halves (make 2)
With Pink,
Round 1 – sc 6 in a magic ring (6)
Rounds 2-3 – sc around (6) (2 rounds)
FO, leaving a 3 in (8 cm) tail. Do not FO second half
Halves will be joined in Round 4
Round 4 – sc in first st of 1st half and in each st around, sc around 2nd half (12)
Rounds 5-6 – sc around (12) (2 rounds)
Begin stuffing
Round 7 – [sc 2, inv dec] 3 times (9)
Round 8 – [sc 1, inv dec] 3 times (6)
Finish stuffing and FO, leaving an 8 in (20 cm) tail. To close hole, using tapestry needle and tail, insert needle into FLO of each stitch of round 8. Pull tail to close, weave in tail.
Attaching the heart
To attach the heart to the kitten’s hands, use an 8 in (20 cm) piece of main body color and insert it through the body. Pull the tail out through Round 2 of the arm and into Round 2 of the heart, working back into Round 2 of the arm. Repeat on other side. FO, weave in ends.
Congratulations, your no-sew crochet kitten is finished!! I hope you enjoyed the pattern and the finished outcome. Don’t forget to tag me in your photos on Instagram @hooksandheelers!

CONNECT WITH ME
INSTAGRAM: https://www.instagram.com/hooksandheelers/
YOUTUBE: https://www.youtube.com/@hooksandheelers
PINTEREST: https://www.pinterest.com/Hooksandheelers/